
How to Craft Whisky Tasting Flight Boards from Whisky Barrel Staves
If you’ve ever ordered a flight of whisky at a restaurant, or been to a tasting at a distillery you’ve probably had that flight served on a rustic tasting board. You can recreate that authentic distillery experience at home by crafting your own whisky tasting boards from used whisky barrels. You could purchase flight tasting boards, but they can be expensive, and where’s the fun in that?
Repurposing old whisky barrel staves into tasting flight boards is a perfect way to bring both rustic charm and a piece of whisky history into your home or bar. Not only do these flight boards look stunning, but they also provide a tangible connection to the craft of distilling. Plus, it’s a great way to give old barrels a second life! In this article, I’ll walk you through how to create your own whisky tasting flight boards using reclaimed whisky barrel staves.
Then you can invite some friends over and host your own whisky tasting at home.
Types of Barrels
There are different types of barrels available. If you look online you’ll find lots of oak staves from old whisky barrels. But you’ll also find staves from old wine barrels. Most whisky and wine barrels are made from oak, but you may be able to find other types of wood. I have a bourbon from Crowded Barrel in Texas that’s been aged in Brazilian Amburana wood, but I haven’t seen Amburana wood staves available online.
A barrel can last decades, and is reused multiple times to age whisky, wine, beer, Scotch whisky, tequila, rum, etc. Basically anything except bourbon. By law, bourbon must be aged in new oak containers.
After many years of use, a barrel will start to leak, and if it cannot be repaired, will be sold as is, or broken down into individual staves.
Materials & Tools Needed
Materials:
Whisky barrel staves: Barrel staves are the long slats of wood used to make barrels. Since I’m creating whisky tasting flight boards, I wanted to use old whisky barrels, and I was able to find some from a place in Kentucky that refurbishes used bourbon barrels that have a heavy char on the inside.
Wood stain and/or sealer: Once the staves are cleaned up and prepped, it’s a good idea to protect them with a sealer of some kind. You could also stain the wood before sealing, depending on the type of finish you’re looking for. I’ve just sealed them with a water based polyurethane to keep the boards as natural looking as possible.
Rubber/felt pads: You may want to add some rubber or felt pads to prevent slipping and protect your table from scratches. If the boards are twisted you can place the pads to remove any rocking.
Tools:
Tape Measure and pencil: To measure the length of the boards, and mark the hole positions.
Miter saw, circular saw, or hand saw: A mitre saw works best for safety and stability, speed and efficiency, but if all you have is a hand saw or circular saw, then that will work too. Just be sure to clamp the boards to prevent movement while cutting.
Hammer and centre punch: Used to punch a hole to mark the centre of each glass hole you’re going to drill. The staves are dark after aging for many years and the pencil marks for the hole locations are difficult to see. The small hole allows you to centre the Forstner drill bit at exactly the right location.
Forstner drill bits: Forstner bits are designed for creating very precise holes with perfectly vertical sides and a flat bottom, which is prefect for the holes we are drilling to hold your tasting glasses.
Drill press, or power drill: A drill press is the tool of choice here to give to maximum control drilling precise vertical holes. You can use a power drill, but you’ll need to be careful to ensure the bottom of the holes are level, and the right depth.
Orbital sander, and sand paper, or sanding pads: Used to clean up and prep the staves for staining and sealing. I used 80 grit followed by 120 grit on my orbital sander to sand the wood, and 400 grit sandpaper to sand the polyurethane between coats.
Old rag and a tack cloth: A rag to wipe the black carbon off the inner surface so you can handle the stave without getting your hands black, and a tack cloth to clean the dust off the boards before sealing.
Laser engraver, wood burning tool or stencil kit: This is optional, but if you would like to personalize your boards you can add a name, or saying with a laser engraver, a wood burning tool, or stencil kit.
How to Craft Your Own Whisky Tasting Flight Boards
Step 1: Select & Prepare the Whisky Barrel Staves
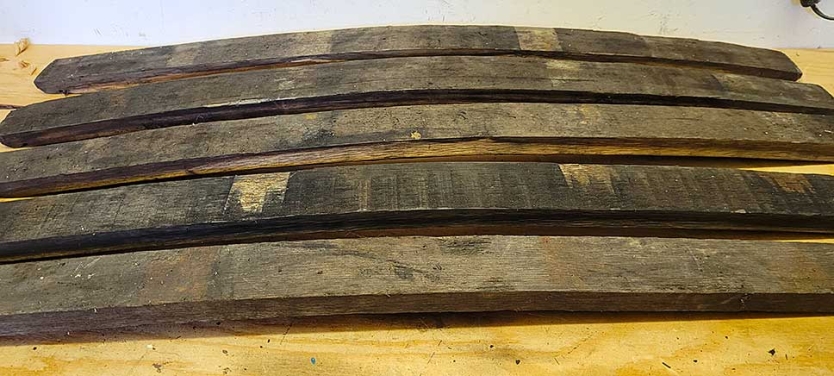
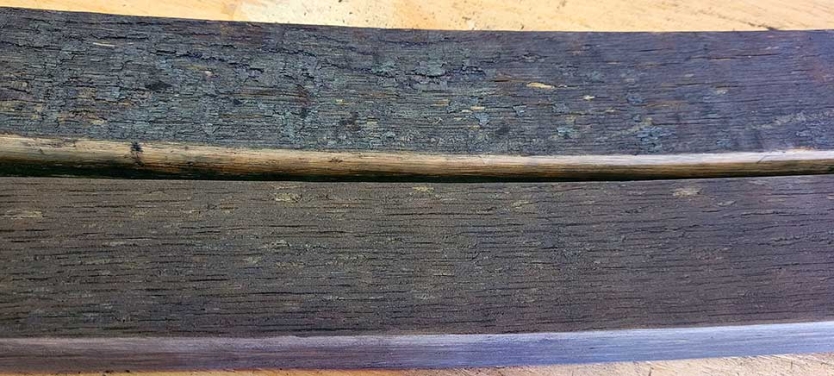
Old whisky barrels can be found at many distilleries, online retailers, or specialty stores. These staves are curved, charred, and full of character, having been part of the aging process for years. When selecting your staves, make sure they are structurally sound, without too many deep cracks or rot.
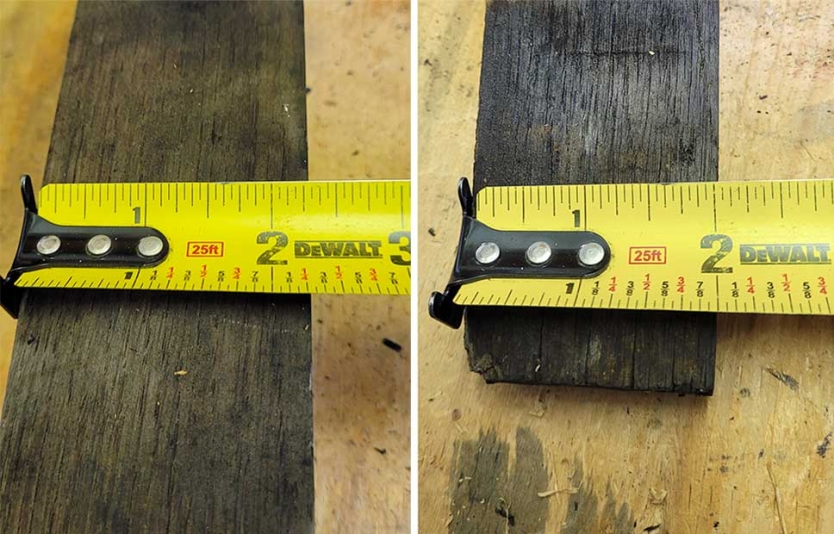
Be sure to look for staves that are at least 2 ½ - 3” wide in the middle. Some of mine are only 2 ¼ inches wide and they are a bit narrow. Many of the ones I’ve seen for sale online are less than 2” wide, or come in a box with a variety of widths. Anything less than 2 ¼ inches wide may not be wide enough for a hole to hold a tasting glass with a wider base.
A Glencairn glass will fit in a 1 3/4" hole, but I have more than 25 whisky glasses, and some small cocktail glasses, in many different styles. Some have a very large base, and the 1 3/4” hole is not large enough, so I’m using a 2” bit which is the minimum I need to hold a variety of different glasses.
Wider boards will also be more stable.
Step 2: Cut the Staves to Length
I’m creating boards with 4 glass holes. Each hole is 2” in diameter, and there needs to be enough room between holes to comfortably pick up a glass without hitting the glass next to it. I decided to make the holes 4” apart, leaving a 2” gap between holes. This means that each board should be around 18” long – 12” for the 4 glasses, plus 3” from the centre of the last hole to the end of the board.

My staves were 35” long. I could cut them in half to create 2 boards per stave, that would work, but my staves were quite narrow, only about 2” at the ends, and I needed a 2” hole to be large enough for the glasses, so I opted to use the wider part of the board and cut off each end. Using one stave for 2 boards will also result in boards that are wider at one end than the other – not a big issue, but I wanted them to be symmetrical.
If you want to create a board with 6 holes, you’ll need to have a longer, wider board.
Be sure to confirm the size of hole you’ll need for your glasses, and make sure the board is wide enough.
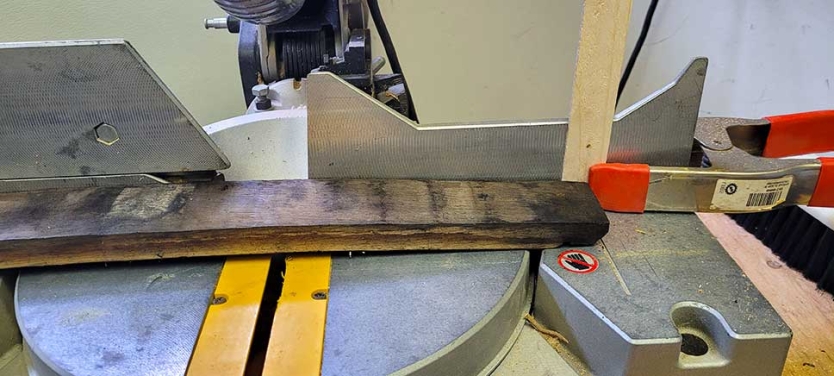
Since the boards are narrower at the end (2”) than the middle (2 ¼”), I clamped a shim to my miter saw to ensure I had a straight cut across the end of the board.
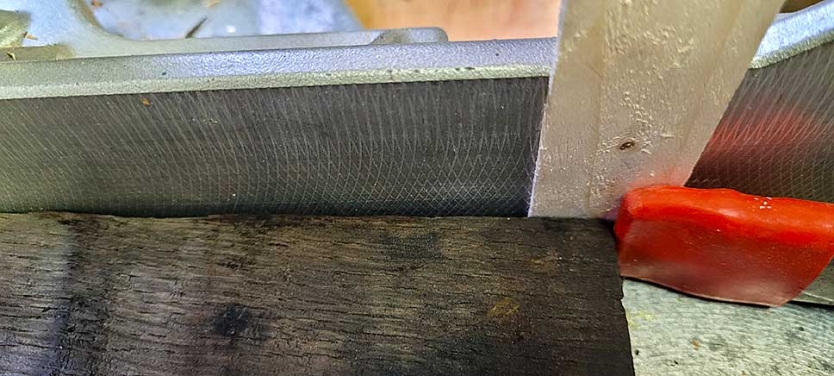
In my case, I needed to cut 8 1/2 “ off the end of each 35” stave to be left with an 18” board, so I used the clamp that was holding the shim as a stopper to mark where the board needed to be to take 8 ½” off each end.
Step 3: Clean and Sand the Staves
The barrel staves will need a bit of cleaning and sanding. The ones I purchased had been sitting outside in the elements for some time. They were in a pile on the ground and I think some of them had been there for years.
You’ll want to sand the surface smooth. I chose an 80 grit for the first round, followed by a 120 grit sandpaper. You could use a higher grit to create a smoother finish, but this is a rustic product, not a piece of fine furniture, so it does no need to be too smooth.
Touching the inner charred surface will leave your hands black. Sand it lightly, just enough to take off the loose flaking char. You want it to still be black – the dark surface adds to the character – so be careful not to sand it too much. The goal is to remove the dirt and flaking char while preserving the texture and patina that tells the story of the stave's history.
Wipe the black inner surface with a damp cloth to pick up the black dust so your hands are not black when handling during the next steps. We’ll use a tack cloth at the end to clean off any dust prior to sealing.
Level the Boards
The boards will likely be twisted and not lie flat on your table. You can correct this by placing rubber feet under the corners after sealing, but if the staves are badly twisted you may want to sand down the corners a little bit. To do this:
- Set the board on a surface you know is flat
- Determine which corner are too high (the corners currently in contact with the surface)
- Sand those corners down. Do this is steps, checking frequently until the corners are sanded down to a point where the board no longer rocks, or rocks very little. Final adjustments can be made with the placement of rubber feet at the ends.
Step 4: Mark and Drill the Glass Holes
Mark the Glass Holes
As I mentioned above, I’m drilling 4 holes, with 4” between the holes. You want to make sure the holes are lined up, evenly spaced, and centered across the width of the board. To do that:
- Measure the length of the board to find the middle
- Measure 2 inches on each side of the middle of the board and mark the center of each of the first 2 holes, the ones closest to the middle
- Measure 4” out from the center of each of those holes and mark the centre of the next 2 holes
- Then measure the width of the board at each of the marks you just made, and mark the center of the board
You now have 4 marks, one for each hole, evenly spaced and centered across the width of the board. Because the board is weathered, it will be dark making it difficult to see the pencil marks. This is where the centre punch comes in. Use a hammer and punch to make a small hole where you marked the centre of each glass hole. This will make it easy to set your drill bit right at the centre of each hole.
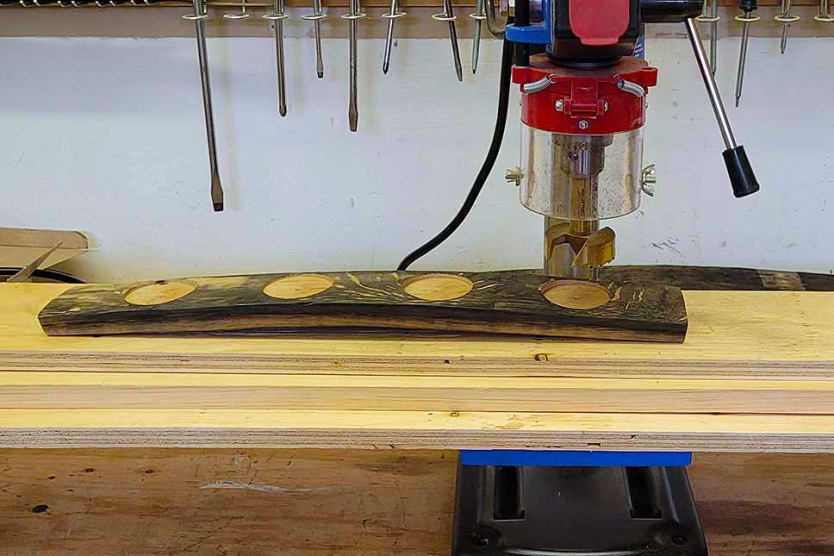
Drill the Glass Holes
The staves are curved, but you want the holes to all be vertical, not perpendicular to the surface of the stave, so you’ll need to set up a flat stable surface to support the stave while drilling the glass holes.
- Place a board across the table of your drill press that’s long enough to support the stave while drilling each hole.
- Align the centre of the Forstner bit with the hole you punched for the first glass hole.
- Using the recommended speed for your Forstner bits, drill a hole about 1/8 of an inch deep
- Slide the stave sideways and drill the remaining 3 holes
If using a hand held drill, clamp the stave securely to your work table to prevent it from moving and drill the holes as close to vertical as you can. Aim for a depth of about 1/8".
Step 5: Add Personal Touches
Completely optional, but if you want to add a personal touch, now would be the time. Use a laser engraver, wood burning kit, or stencil to add a saying, logo, or name to personalize the tasting flight boards.
Step 6: Finish and Seal the Boards
Be sure to clean the dust off the boards with a tack cloth and find a clean dust free place to stain and seal the boards. I chose not to stain mine because they were already dark enough, and I didn’t want to hide any of the grain or imperfections in the wood.
Follow the manufacturer instructions for the stain/sealant you’re using. Be sure to seal the underside of the board as well to seal in the black char.
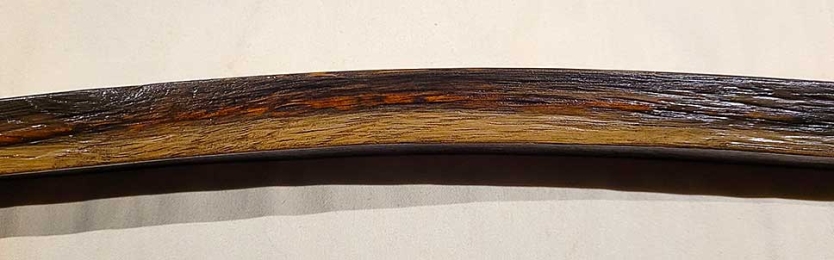
A good sealer will bring out the colour and shade differences in the wood. In the above image, you can clearly see the difference in colour. The inside of the stave is much lighter than the outside and has a well defined red line, which is sometimes referred to as the penetration line, or soak line. The lighter area, up to the soak line is where the whisky has penetrated the wood as the barrel expands and contracts with the seasons, drawing the whisky further and further into the wood.
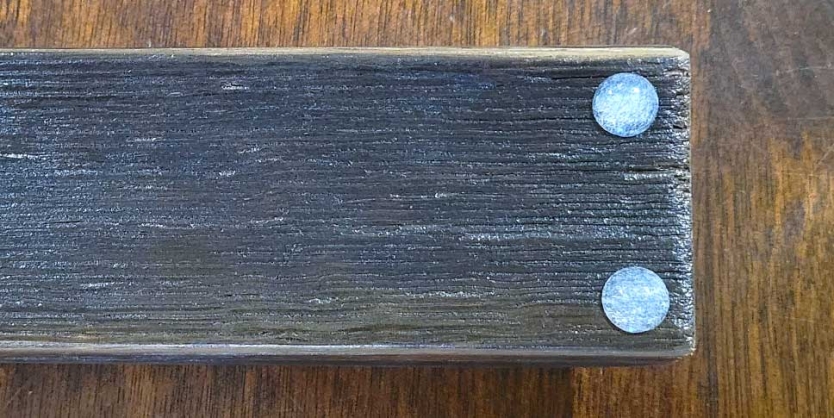
Step 7: Add Feet for Stability
Add small rubber or felt pads to the 4 corners of each board to help with stability and protect your table from scratches and wear. Rubber pads will help prevent the boards from sliding around. If your boards do not sit flat on the table, you can adjust the position of the feet to prevent them from rocking.
I just purchased some cabinet door bumpers from Amazon for less than $10.
Step 8: Test the Tasting Flight Board
Well that was fun wasn’t it? But we’re not done yet. After all this hard work the last thing you absolutely must do is take your new flight board for a test flight. See what I did there? Set 4 glasses into your new flight board, break out 4 of your favourite bottles, and pour a sample into each glass.
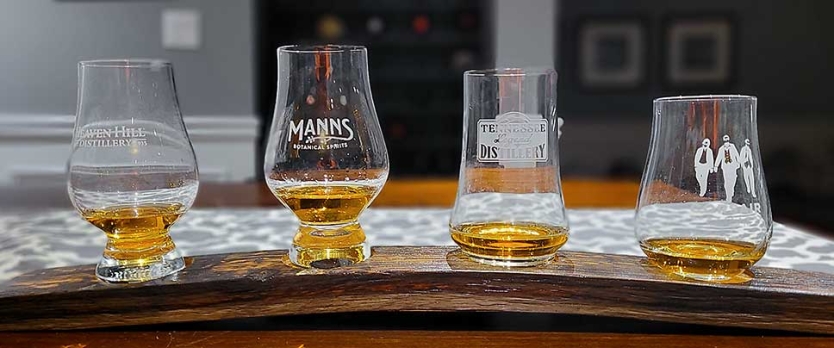
I can almost guarantee they’ll taste better off your new flight board than they ever have before.
Oh, and maybe invite some friends over for a whisky tasting to show off your new flight boards. I’m sure they’ll be impressed with what you’ve created.
If you've never been to a formal whisky tasting, you may want to read up on How to Taste Whisky for some tips on how to get the most out of a whisky tasting.


Comments
Be the first to leave a comment.